Subtotal ¥0.00
Troubleshoot common thermal wristband printing issues with clear fixes and learn how LinkWin premium wristbands prevent jams and faded barcodes
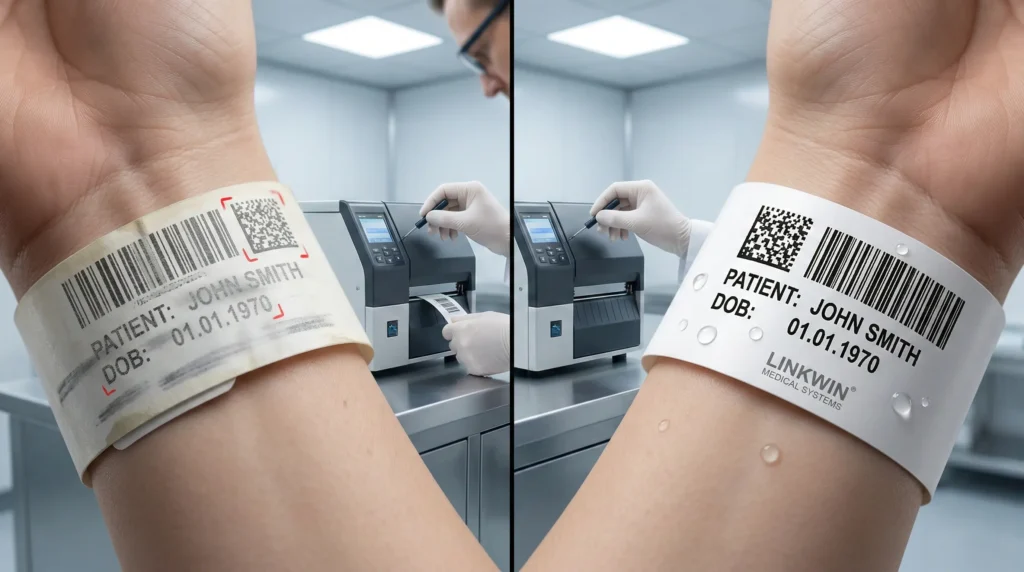
A jammed printer or a smeared barcode is more than just a “tech glitch”—it’s a high-stakes bottleneck that can halt hospital admissions or stall a music festival’s gates.
I know how frustrating it is to see a “Paper Out” error when your roll is clearly full. I’ve spent years troubleshooting hardware in these high-pressure environments, and I’ve seen it all. Most thermal wristband failures aren’t fatal; they’re just poorly understood.
In this guide, you’re going to learn exactly how to solve faint printing, ribbon wrinkling, and barcode legibility problems. Whether you’re using direct thermal or thermal transfer technology, these are the battle-tested LinkWin solutions I use to keep operations running smoothly.
Let’s dive right in.
Faint or Faded Thermal Printing
When wristbands come out light or unreadable, the issue usually stems from a disconnect between your hardware settings and the media requirements. In my experience, achieving high-contrast barcode legibility starts with fine-tuning how the printhead interacts with the synthetic wristband material.
Optimizing Print Darkness Settings
If your print looks washed out, the first step I recommend is adjusting your print darkness settings. In your printer driver or software, incrementally increase the darkness (heat) level.
- Caution: Avoid jumping to the maximum setting immediately, as excessive heat can lead to premature printhead maintenance issues or even “burn-through” on thin media.
Slowing Down Thermal Print Speed
Speed is often the enemy of clarity. When the thermal print speed is too high, the chemical reaction on the wristband surface doesn’t have enough time to complete.
- The Fix: Reduce the print speed in your settings. This allows for a more deliberate heat transfer, ensuring that every pixel is fully saturated and the text remains crisp.
The Direct Thermal Scratch Test
If you are seeing no image or extremely faint ghosts of text, you may be using the wrong technology. I use the direct thermal scratch test to verify media compatibility:
- Take a wristband and quickly scratch the surface with your fingernail or a coin.
- Black Streak: The media is direct thermal.
- No Mark: You are likely using thermal transfer media which requires a ribbon.
Checking Printhead Pressure
Uneven or faint printing across the width of the wristband is frequently a mechanical issue. If one side is darker than the other, I suggest checking the printhead pressure.
- Balance the Toggles: Ensure the pressure arms or dials are set equally.
- Alignment: If the pressure is too low, the printhead won’t make sufficient contact with the media, leading to faded sections and failed scans.
| Issue | Potential Cause | Solution |
|---|---|---|
| Light Overall Print | Low darkness setting | Increase darkness in driver settings |
| Blurry Edges | Print speed too high | Lower the inches-per-second (IPS) rate |
| Faint on One Side | Uneven pressure | Adjust printhead pressure toggles |
| No Print/Very Faint | Media mismatch | Perform scratch test to confirm media type |
Fixing Blank Wristbands and Ghost Prints
If your printer is spitting out blank strips or faint “ghost” images, it’s usually a setup or software communication error rather than a hardware failure. I see this most often when the media orientation or the thermal transfer ribbon isn’t aligned with the printer’s current settings.
Correct Media and Ribbon Loading
A blank wristband often means the heat isn’t hitting the treated side of the material.
- Direct Thermal Orientation: These wristbands are heat-sensitive on one side only. If the roll is loaded backward, the printhead hits the inactive liner, resulting in zero image.
- Thermal Transfer Ribbon Face: If you are using a ribbon, ensure the inked side faces the wristband, not the printhead. You can test this by pressing a piece of adhesive tape to the ribbon; the ink should peel off onto the tape.
- Path Alignment: Ensure the material stays centered under the printhead. Even a slight shift can cause the sensor to miss the “start” of the wristband, leading to ghosting or blurring as the printer tries to find its place.
Verifying Driver Mismatch Settings
Your printer hardware and your computer software must be in total sync. A driver mismatch is a leading cause of “ghost” prints where the text appears light, doubled, or shifted.
- Media Type Selection: Check your print preferences to ensure the “Paper Type” matches your actual stock (e.g., “Thermal Transfer” vs. “Direct Thermal”).
- Sensor Type: If your wristbands have a black mark on the back, the driver must be set to Reflective/Mark Sensing. If it’s set to “Continuous” or “Gap,” the printer won’t know where to stop, causing it to skip sections or print halfway across two wristbands.
- Print Speed and Darkness: If the driver is set to “Low Resolution” or high speed, the printhead won’t have enough time to heat the material, leading to faint images. Low-quality drivers can cause ghosting when the heating instructions overlap.
Solving Jams and Media Misalignment: Common Printing Issues with Thermal Wristbands and How to Fix Them
When wristbands aren’t lining up or keep sticking in the feeder, it usually means the printer has lost its physical or digital “track.” I’ve found that most jams are caused by simple physical blockages or sensor confusion.
Run a Manual Media Sensor Calibration
If your printer is skipping wristbands or the alignment is off-center, you need to perform a manual media sensor calibration. While many printers attempt to auto-calibrate, they often struggle with the unique thickness or gaps of synthetic wristband material. A manual calibration forces the sensors to accurately map out the “start” and “stop” points of each tag, ensuring the print hits the center every time.
Adjust the Media Guides
The media guides should be snug against the roll but never tight.
- Too Loose: The wristband will drift side-to-side, causing slanted prints or media misalignment.
- Too Tight: The printer motor has to work harder, which frequently leads to bunching and paper jams.
Make sure the roll is centered and the guides are just touching the edges of the media.
Clean Adhesive Buildup and Platen Roller Debris
Because many thermal wristbands use “peel-and-stick” closures, adhesive buildup is one of the most common causes of persistent jamming. Sticky residue can transfer onto the rollers, catching the next wristband and wrapping it around the internal components.
| Component | Maintenance Task |
|---|---|
| Platen Roller | Wipe away platen roller debris and sticky residue using a lint-free cloth and 99% isopropyl alcohol. |
| Media Path | Inspect the entire track for small scraps of synthetic material or glue that could block the sensors. |
| Sensors | Gently blow out any dust or paper lint that might be obstructing the optical eye. |
Dealing with Vertical White Lines and Voids in Thermal Wristbands
When vertical white lines appear consistently across your thermal wristbands, it is usually a sign of a blocked or damaged heating element. These voids are a major problem for barcode legibility, as even a tiny gap can make a wristband unscanable. In my experience, catching this early during printhead maintenance can save you from wasting an entire roll of media.
Cleaning with Isopropyl Alcohol
Most vertical streaks are caused by simple debris or adhesive buildup on the printhead.
- The Quick Fix: Use a lint-free cloth or a specialized cleaning pen saturated with 99.9% isopropyl alcohol.
- The Technique: Gently wipe the length of the printhead to dissolve any residue. I recommend doing this every time you change a roll to prevent permanent damage.
Identifying Blown Pixels and Hardware Failure
If a vertical line persists in the exact same spot after a deep clean, you are likely dealing with blown pixels.
- Permanent Damage: This occurs when the individual heating elements on the printhead are physically burnt out or scratched.
- The Diagnosis: Inspect the printhead for physical nicks. If the line is sharp and never moves, the hardware has failed.
- Hardware Replacement: Unfortunately, there is no “software fix” for a blown pixel. To restore full barcode resolution and print quality, the printhead must be replaced. Proper handling and keeping the environment free of dust are the best ways to avoid these costly hardware failures.
Stopping Smudging or Blurred Barcodes
Smudged barcodes are a nightmare for security and patient safety. When a barcode is blurry, it’s usually because the printer is running too “hot” or the materials aren’t compatible. I’ve found that the fastest way to fix Common Printing Issues with Thermal Wristbands involving smears is to fine-tune your software settings and hardware pairing.
Adjusting Heat and Speed Settings
If your print looks “melted” or bleeds at the edges, your print darkness settings are likely too high. High heat causes the ink or wax to spread beyond the intended area, ruining barcode legibility.
- Lower the Darkness: Drop the darkness setting in your printer driver by 2–3 increments until the lines are crisp.
- Check Thermal Print Speed: If you’re printing too fast, the printhead doesn’t have time to cool between pixels, causing ghosting or blurring. Slowing it down often yields a sharper image.
Matching Ribbon to Synthetic Wristband Material
In thermal transfer printing, using a standard wax ribbon on a synthetic wristband material is a recipe for disaster. It won’t bond properly and will wipe off with a simple touch.
- Use Resin Ribbons: For hospital or event wristbands, always use a full resin ribbon. Resin is designed to bond with synthetic surfaces, making the print resistant to water, alcohol, and friction.
- Compatibility Check: Ensure your ribbon width slightly exceeds the width of the wristband to protect the printhead and ensure edge-to-edge coverage.
Proper Handling and Hygiene
Even the best print job can be ruined by environmental factors. Since these wristbands are often used in high-contact areas, “human” factors play a huge role.
- Avoid Oils and Lotions: Advise staff to handle unprinted media with clean, dry hands. Skin oils can create a barrier that prevents the heat from transferring the image correctly.
- Storage Matters: Keep your wristband rolls in a cool, dry place. Humidity can soften the coating on thermal wristbands, leading to smearing immediately after they exit the printer.
Fixing Ribbon Wrinkling and Diagonal Voids
When you see diagonal white lines cutting through your design, you are likely dealing with a ribbon wrinkle. This is one of the most common printing issues with thermal wristbands, typically occurring in thermal transfer setups where the ribbon doesn’t feed straight.
Adjusting Ribbon Tension
The ribbon must flow across the printhead with perfectly even resistance. If the tension is off, the ribbon will bunch up and create “tunnels” that prevent ink transfer.
- Check the Supply Spindle: Ensure the ribbon is centered and the spindle isn’t spinning too freely.
- Modify Tension Settings: Most printers have a mechanical adjustment nut or a digital setting to increase or decrease ribbon drag.
- Check the Take-up Core: A loose or slipping take-up core often causes the ribbon to sag and fold.
Leveling Printhead Balance
If your printer applies more pressure on one side than the other, the ribbon will “walk” toward the side with less pressure, causing it to crease.
- Adjust Pressure Toggles: Move the pressure blocks to balance the load across the entire width of the wristband.
- Align the Ribbon Shield: Some printers have a ribbon strip plate or shield. If this is skewed, it needs to be realigned to ensure a flat path for the media.
| Symptom | Primary Cause | Immediate Action |
|---|---|---|
| Diagonal Voids | Ribbon Creasing | Adjust ribbon tension or head pressure |
| Ribbon Walking | Uneven Head Balance | Re-center the pressure toggles |
| Frequent Ribbon Snaps | Excessive Tension | Loosen the supply spindle drag |
Addressing these mechanical misalignments ensures your barcode legibility remains high and prevents wasted synthetic wristband material. Regular checks on the ribbon tension adjustment settings will keep your operations running without these distracting visual defects.
Proactive Maintenance for Thermal Printers
To avoid Common Printing Issues with Thermal Wristbands and How to Fix Them, you have to stay ahead of the wear and tear. I always recommend a “prevention over cure” approach. Regular printhead maintenance is the only way to ensure your hardware lasts as long as it should and your barcodes remain crisp.
The 1:1 Cleaning Rule
The simplest way to keep your printer healthy is the 1:1 cleaning rule. Every single time you finish a roll of synthetic wristband material or a ribbon, clean the printhead.
- Use Isopropyl Alcohol: Use a 99% isopropyl alcohol cleaning swab or lint-free cloth.
- Wipe the Printhead: Gently run the swab across the heating elements to remove buildup.
- Clean the Platen Roller: Don’t forget to wipe the rubber roller to remove platen roller debris and adhesive buildup.
Environmental Factors and Storage
Thermal media is sensitive. If you store your wristbands in a hot warehouse or a damp basement, the chemical coating will degrade before you even load the roll.
- Temperature Control: Store your media in a cool, dry place (ideally 60-80°F).
- Avoid Direct Sunlight: UV exposure can cause pre-discoloration or “ghosting.”
- Dust Prevention: Keep your printer covers closed. Dust acts like sandpaper on a printhead, leading to blown pixels.
Best Practices for Synthetic Media
Synthetic wristbands are durable, but they require specific care to prevent hardware strain.
- Check for Adhesive Ooze: Cheaply made wristbands often have adhesive that bleeds from the edges. This “ooze” sticks to the sensors and rollers, causing jams.
- Matched Settings: Ensure your print darkness settings and thermal print speed are optimized for the specific thickness of your synthetic media. Overheating the printhead to “force” an image onto thick material will significantly shorten its lifespan.
Thermal Wristband Troubleshooting FAQs: Solving Common Printing Issues
I’ve spent years helping teams navigate the technical hiccups that come with high-volume printing. Most common printing issues with thermal wristbands aren’t caused by a “broken” printer, but by small calibration errors or maintenance gaps. Here are the answers to the questions I hear most often.
Why does my printer skip wristbands?
When a printer skips a band or leaves one blank before printing the next, it’s usually a signaling problem. The media sensor isn’t accurately detecting the gap or black mark between the bands.
- Run a manual media sensor calibration: This forces the printer to “learn” the thickness and backing of your specific media.
- Check the sensor position: Ensure the sensor is aligned with the gap or the black timing mark on the underside of the wristband.
- Verify Driver Settings: Make sure your software is set to “Gapped” or “Mark” sensing to match your actual roll.
How do I fix a “Media Out” error when the roll is full?
It’s frustrating when the red light flashes even though you have plenty of stock. This is typically a “blind” sensor.
- Clean the sensors: Use a canned air duster to blow out paper dust or adhesive buildup that might be covering the sensor eye.
- Check the media path: If the wristbands aren’t tucked firmly under the media guides, they can lift or shimmy, causing the sensor to lose its place.
- Reset the tension: Ensure the roll is spinning freely and isn’t jammed against the side of the internal compartment.
When should I replace the printhead?
Printhead maintenance can extend life, but eventually, the hardware wears out. I tell my clients to look for these three “dead” signs:
| Symptom | Cause | Solution |
| :— | :— | :— |
| Consistent White Lines | Blown pixels or physical scratches. | Replacement is required. |
| Faded Output | Worn-out heating elements. | Replace if cleaning doesn’t help. |
| Frequent Jams | Physical damage to the printhead surface. | Replacement is required. |
If an isopropyl alcohol cleaning doesn’t remove a vertical void, the pixel is likely dead, and it’s time for a new printhead.
How do I stop barcodes from smearing?
If your barcodes look “mushy” or smudge when touched, you are likely using too much heat. Achieving crisp barcode legibility requires a balance between speed and temperature.
- Lower the print darkness settings: High heat causes the ink to bleed, ruining the edges of the bars.
- Match your materials: If you are using thermal transfer printing, ensure you are using a high-quality resin ribbon. Wax ribbons will not bond to synthetic wristband material and will rub off instantly.
- Slow down: Reducing the thermal print speed gives the heating elements more time to be precise, rather than just “blasting” the media.
Why is my printer “ghosting” or blurring images?
Ghosting occurs when the platen roller is dirty or the ribbon tension adjustment is off.
- Clean the platen roller: Bits of adhesive can get stuck to the roller, causing it to slip and creating a double-image effect.
- Check the ribbon: If the ribbon is too loose, it can wrinkle, creating diagonal voids or blurred sections across the band. Keep it taut and smooth.
